GIT is gaining popularity as a distributed revision control and source code management system (see the graph below). GIT was developed by Linus Torvalds and released in 2005 for the Linux kernel development¹.
Source: http://qa.debian.org/popcon.php?package=git, 9 july 2012
Regardless of the increasing popularity, the integration of GIT with SSH in Windows7 is still cumbersome. This blog describes my personal experiences as a programmer using GIT with SSH in a windows7 environment.
First, you will have to choose a windows client to work with GIT. There are various options like GitHub, msysgit, tortoisegit, smartgit, EGit plugin for eclipse and GIT-Extensions (for an overview see http://www.makeuseof.com/tag/5-windows-git-clients-git-job/).
This blog is not intended to compare clients or to defend a certain choice but to describe my experiences with GIT-Extensions and SSH.
For usage in a secure development environment with SSH you will have to install PuTTY as the SSH client. PuTTY can be downloaded from http://www.chiark.greenend.org.uk/~sgtatham/putty/download.html.
Make sure you use the Windows installer for all the binaries, the important binaries are: putty.exe, plink.exe, pageant.exe and puttygen.exe.
When Git Extensions is downloaded and installed (you can get it from: http://code.google.com/p/gitextensions/) it will perform tests to ensure a proper setup.
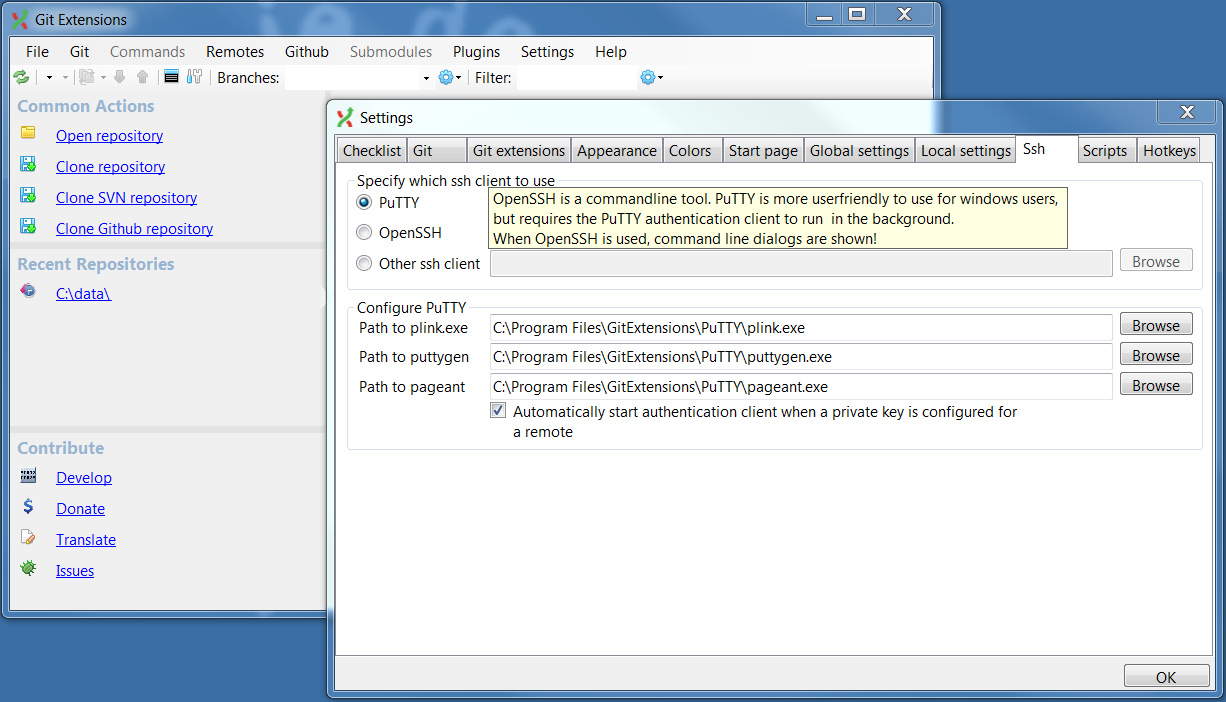
In the Ssh settings choose PuTTY as SSH client, and ensure the correct paths to the various PuTTY binaries.
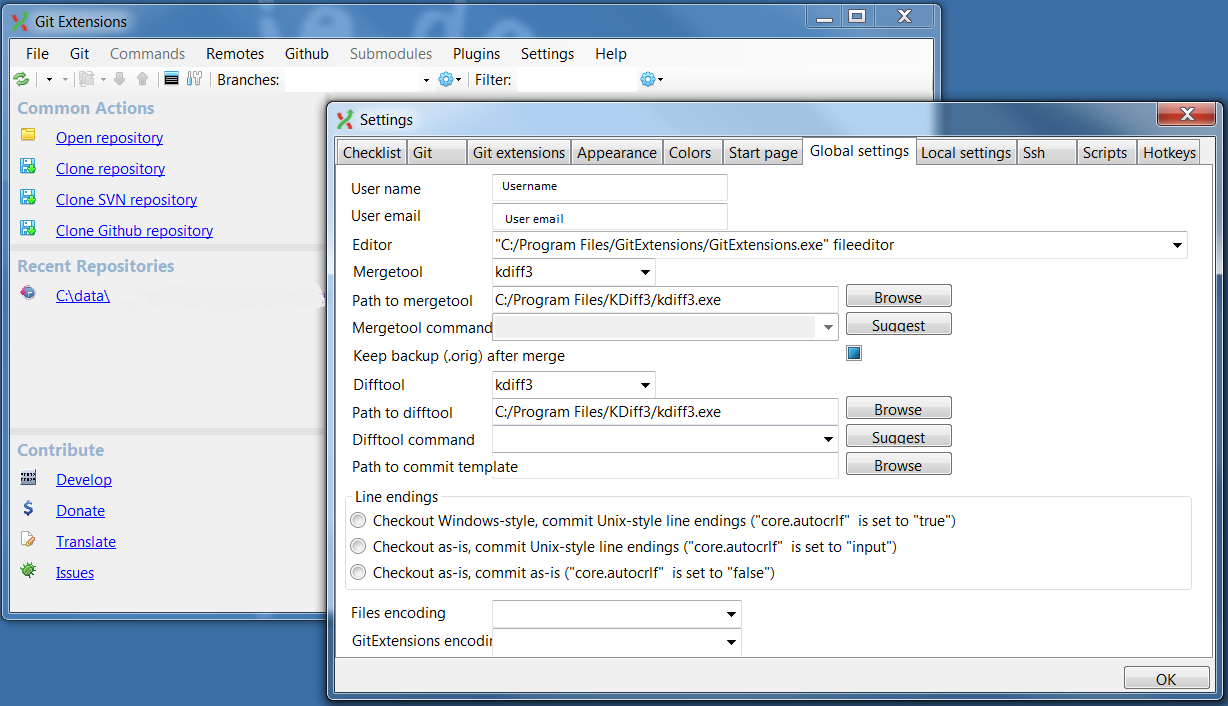
The global settings should look like this (these settings are located in C:\users\'local user'\.gitconfig , in blogs and wikis related to GIT this file is mentioned frequently) :
IMPORTANT: Before using GIT for the first time in your SSH environment, you should first setup a session with the PuTTY client to your remote repository.
When running PuTTY you will have to setup the connection. In the settings category "Session" you have to fill in the Hostname (ie. git.environment.company.com). Choose the correct port (in my case port 22) SSH for connection type and save this session. In the settings category "SSH" select subcategory "Auth" and browse for your private key for authentication (assuming you got one from your administrator).
Select the key file (extension .ppk) and select "open". The session will now be established and the authentication process is registered in windows for future use. If you do not follow these steps, the authentication process will fail and error messages will appear every time you try to use GIT Extensions or when trying to connect to your remote repository.
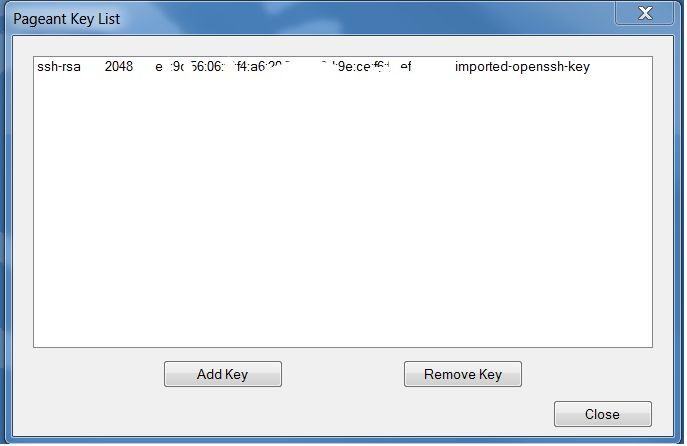
When working with the IDE of your choice it is furthermore necessary to have Pageant running in the background with the correct private key added:
I personally started with the Eclipse IDE (Indigo 3.7.2), but encountered a lot of issues with MAVEN integration and the EGit plugin. I therefore switched to the community edition of IntelliJ IDEA which has an excellent easy-to-use integration for MAVEN and GIT.
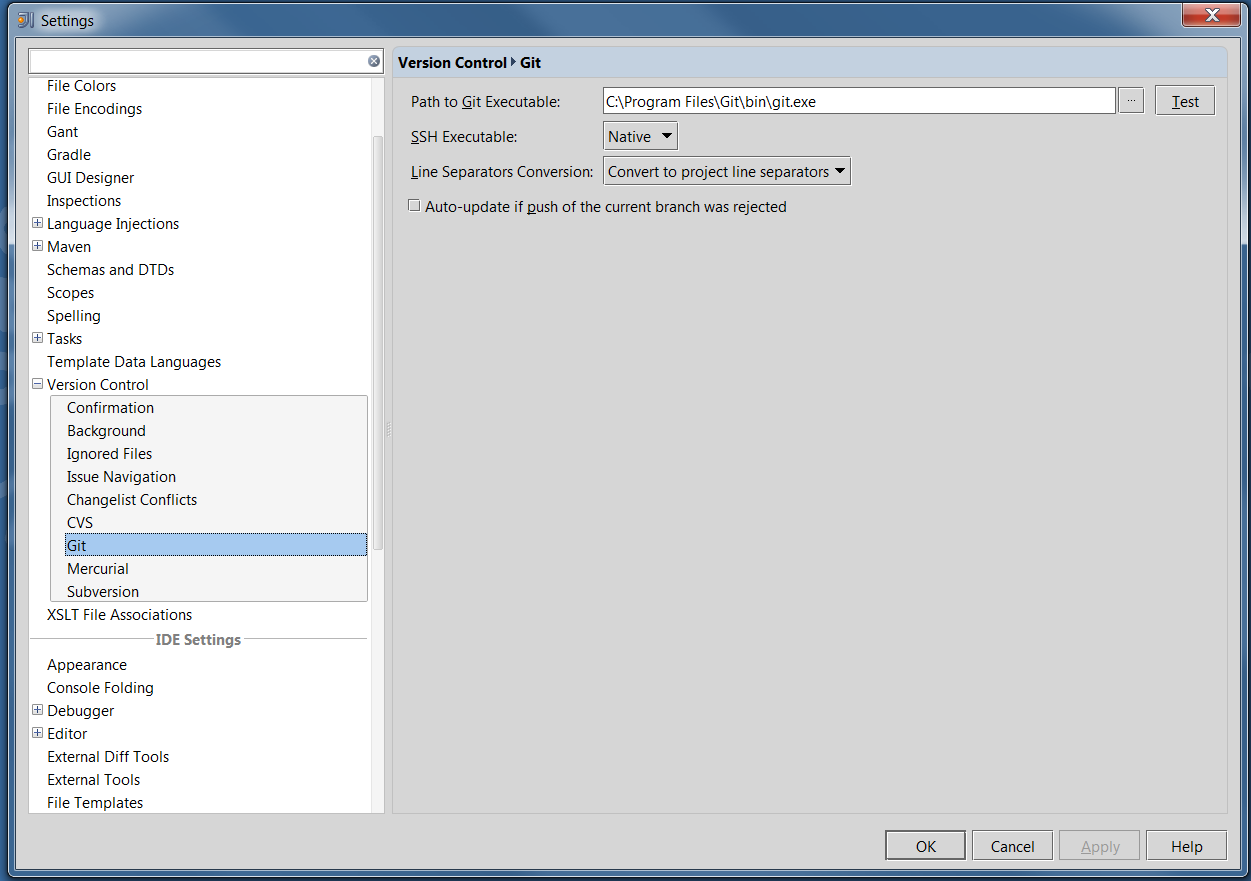
For GIT make sure that in the settings of IntelliJ under Version Control – Git you use the correct path to the Git binary and select the native SSH executable:
In this setup no changes have to be made in environment variables.
That's it...
I hope this blog will help you using GIT and SSH successfully under windows 7.
***
¹ Wikipedia: http://en.wikipedia.org, visited 9 july 2012.